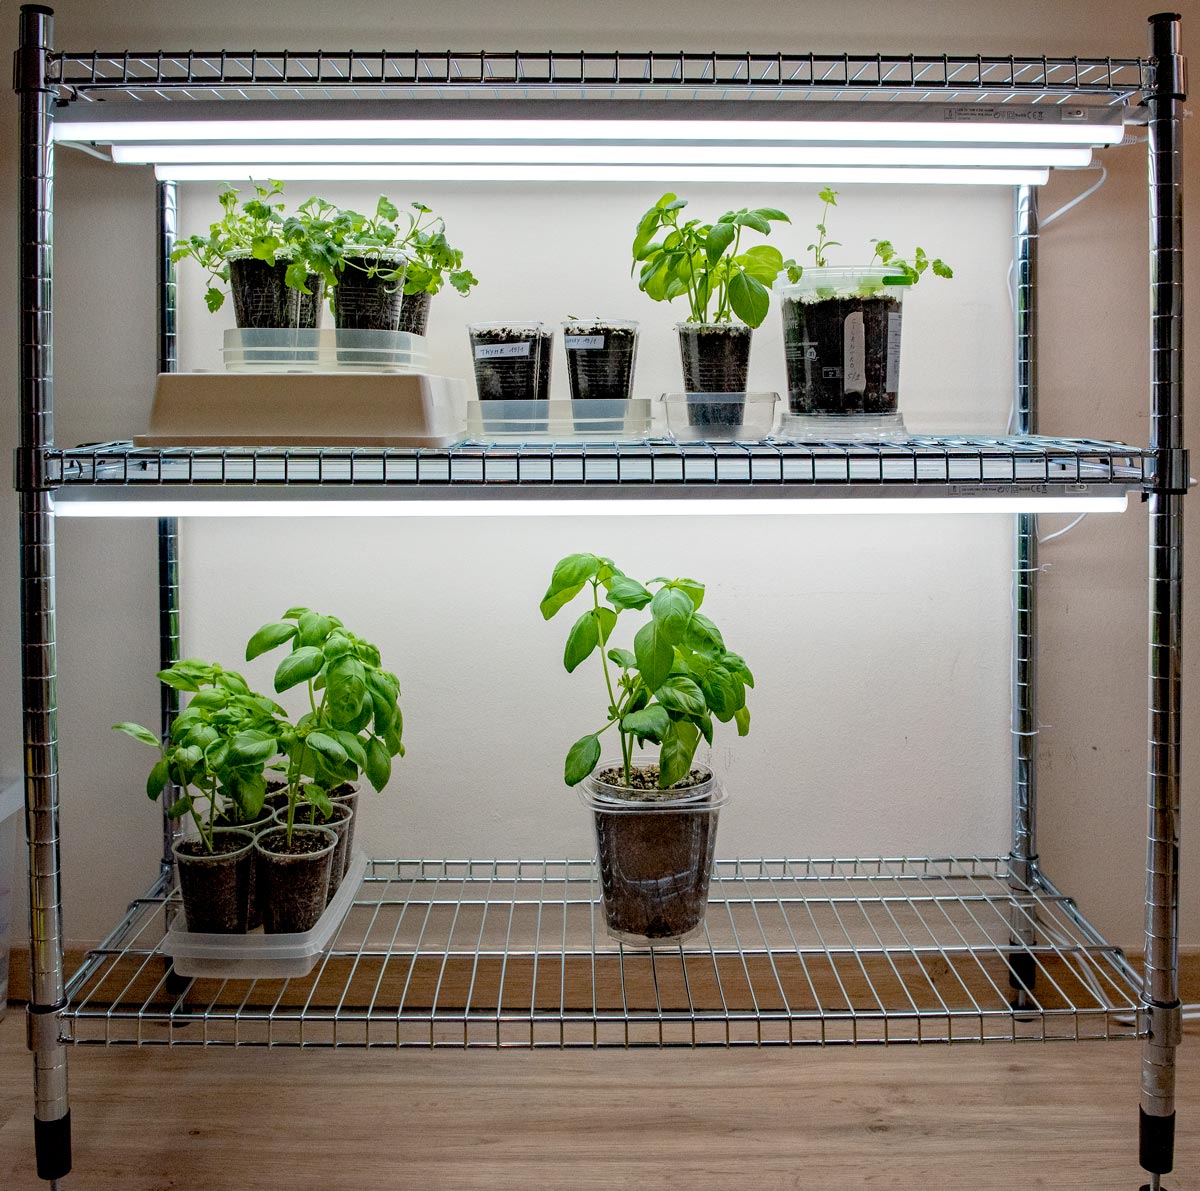
HOW TO BUILD YOUR OWN DIY SEED STARTING STATION
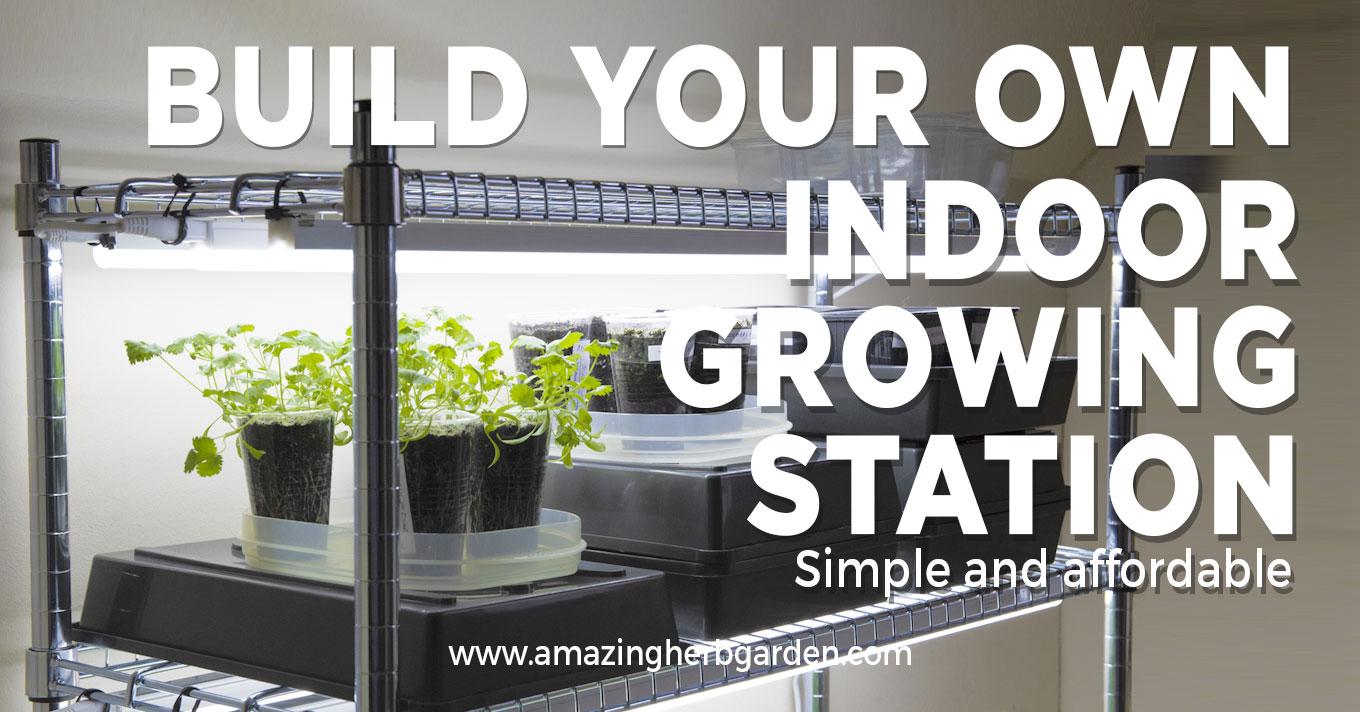
A simple and effective Indoor Grow Light Setup
I’ve built this indoor grow light setup for several reasons.
It allows me to improve my herb growing indoors and it helps me start to grow herbs from seeds in a correct way. During the darker days in winter, this inexpensive DIY grow light system helps me to raise healthy plants indoors, providing supplemental light to my herbs and plants.
I want to share what I have learned from building and using my own seed starting and grow light system. I will explain what works best, what difficulties you may encounter and also what does it will cost, with links to all the equipment and materials used, so you can get started right away.
Here is what you can expect in this article:
- Why build an indoor grow light system?
- What is the difference between a seed starting station and a grow light system?
- What are benefits of an indoor Grow Light System?
- What are the requirements of an indoor seed starting station?
- What parts and materials are needed for an indoor growing station?
- Assembling the grow light system – Pictures and Close-ups
- How much does it cost to build my own seeds starting system?
- VIDEO : Assembling my seed starting and grow light system
- What is next?
1. Why build my own indoor Grow Light System?
Since I started growing herbs, and especially herbs indoors, the growth of my herb plants in winter was a bit disappointing due to the low light circumstances.
Also, whenever I started a new batch of seeds, it was hard to get them growing healthy and bushy.
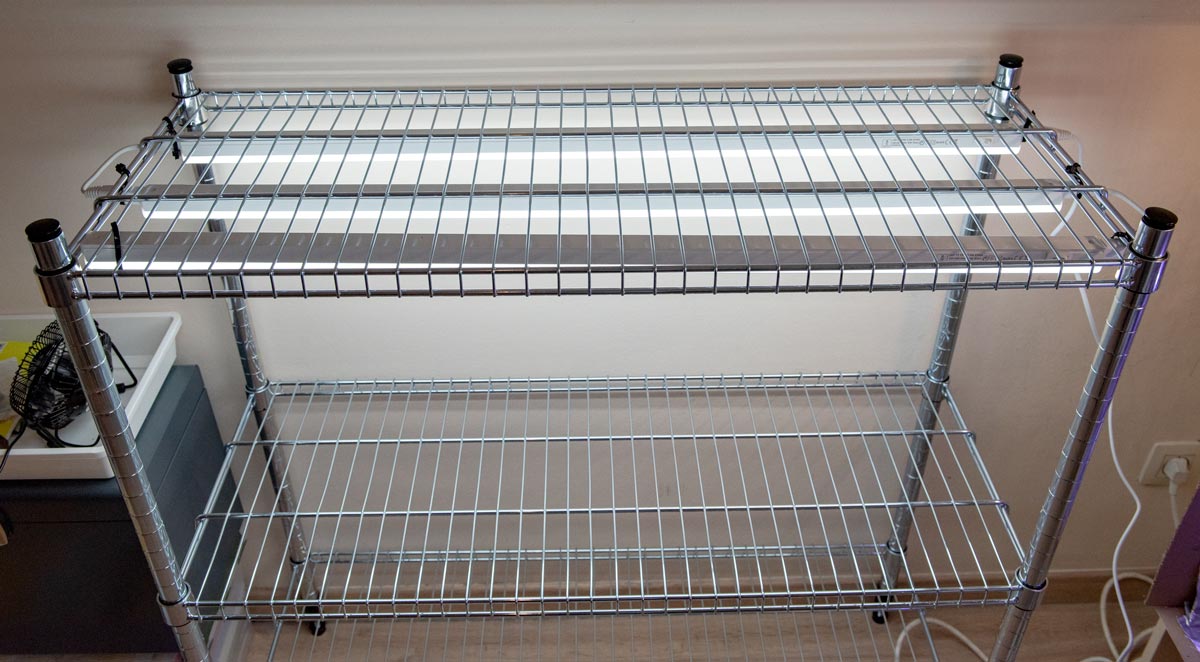
These two reasons made me create my own small 2-shelf grow light system, at the same time ideal for seed starting. So basically I’ve build it to give me full control of the lighting conditions for my indoor herb plants.
I was so satisfied with my own indoor seed starting station or grow light system that I made this article to show you all how easy it is and how affordable it is to make one on your own.
2. What is the difference between a seed starting station and a grow light system?
When I am talking about a seed starting system, I am talking about an indoor setup where I can easily control humidity, temperature and light parameters to create ideal circumstances that allow starting and healthy seedlings grow into beautiful young plants.
It is important to remember that there is a difference between the requirements for seed starting and the requirements for growing established herb plants.
Most of the commercial herb grow light systems are fine for growing herbs and harvesting from established herb plants for example in the kitchen.
Especially the lighting requirements of these commercial grow light systems are not ideal for seed starting (I will explain the requirements below).
The indoor seed starting system I am building will also be perfect as an indoor grow light system to grow herbs and plants indoors at a later growth stage of the plants. That is also the reason why I use both the terms seed starting station and indoor grow light system as interchangeable in this article.
For me, my seed starting system = my indoor grow light system.
3. What are benefits of an indoor Grow Light System?
Get a head start – gain time
With an indoor grow light system you are basically in control of your indoor garden. You can control the temperature, the light duration and intensity, and you actually are in control of the growth of your herb and plants.
If you want to grow herbs outdoors in the herb garden, you can get a nice head start of multiple weeks or months of growth on the indoor growing station.
Instead of waiting till the last frost date is over to sow seeds in the garden, we can transplant big and stronger herbs and plants into the garden soil. With this head start, we can get to harvest sooner and also for much longer than if we were to sow our seeds directly outdoors.
Very beneficial for seed starting and seed germination rates.
An indoor grow light system gives control. I set the light and the temperature, and I can provide moisture and water using trays as needed.
The young transplants are bigger and stronger under my own DIY indoor growing station than with a seed start on the window sill. The adjustable distance to the lights of the growing station makes the growth of our seedlings strong and compact. On a window sill, the sprouts are often very leggy, spindly and weak when they grow their way towards the light in the window. I know from experience that this is also the case with south-facing windows.
I have used some relatively expensive commercial herb growing systems too. And although the growth with such a commercial system is better than on the window sill, the difference with my own DIY grow light system is huge, especially for seed starting. No more leggy and weak seedlings for me.
You will typically have a higher germination rate too under grow lights, making you use less seeds.
With our setup, we can also determine when we start new seedlings, making this method applicable for multiple transplanting moments throughout the season. Isn’t that great?
Use it for other plants than herbs
Although the primary purpose of my grow light system is to grow and seed start herbs indoors, it also allows me to growing smaller plants like lettuces, other greens (even microgreens) and plants.
For those people who live in a particularly cold climate, this indoor grow light system can be a great solution for growing herbs since it’s more difficult for you to grow outdoors during the colder seasons.
Other good reasons why you should consider building your own grow light system for herbs:
- It is relatively inexpensive when you compare it to some commercial systems, and it usually pays for itself during the growing season
- You can start small and expand as budget permits, or
- Is easy to set up and is made with parts that are easily found locally
- Once built, you are good for years to come giving a great ROI on your initial investment
4. What are the requirements of an indoor seed starting station?
Light and ventilation are in my experience the two very important variables when it comes to successfully growing healthy herbs indoors.
Lighting requirements
It is important to have a good understanding of the lighting requirements of sprouting seedlings. In this context there are two notions that are essential to explain: Lumen and Kelvin.
Lumen is an indication of the brightness of a light source. The higher the number the more intensity comes from the light source. For seed starting we need a very high intensity of light because we want to hit the sprouts with high intense light the moment they break through the soil surface. The intense light will prevent that they will start reaching out towards the lights source and become leggy. Without enough light you’re going to grow leggy, weak plants and we don’t want that.
I try to have at least 2500 Lumens of light intensity above every shelf.
Kelvin gives an indication of the colour of the light. The higher the Kelvin number the closer it will get to natural light. Most resources indicate to choose a light with a color temperature in the blue range (5,000 – 7,000K) to promote vegetative growth of plants. I use Led lights with 6500K light temperature which is effective for germinating herb seeds and growing herb transplants.
The distance between the top of the soil or the top of the seedlings and the lights is 2 to 3 inches. And as a standard, I keep the lights on for 16 hours and off for 8 hours. This light cycle is guaranteed by using digital timers to control the switching on and off of the lights.
Temperature requirements
The best grow temperature for seedlings is 70-78 °F (21-25 °C), when the lights are on during the “daytime” and not lower than 60-65 °F (16-18 °C) at “night”.
Until now I haven’t used a heat mat yet. There was no necessity so far because I am starting my seeds indoors in a room with normal indoor room temperatures.
Moisture and Air flow requirements
A good air flow is necessary to avoid molds and mildews. The humidity should’t be too high (45-55% is ideal), that is why indoor herb growing stations need to have a proper ventilation system to prevent these molds.
It is also important to allow good air circulation in and around the plants. That is why an open wire rack shelf system is a good choice for building a seed starting station or an indoor grow light system. It allows air circulation a lot better than a closed wooden shelf system for example.
5. What parts and materials are needed for an indoor growing station?
In this paragraph I share all the parts I have used to put together my grow light system.
- A shelf, metal wire rack
- LED lights
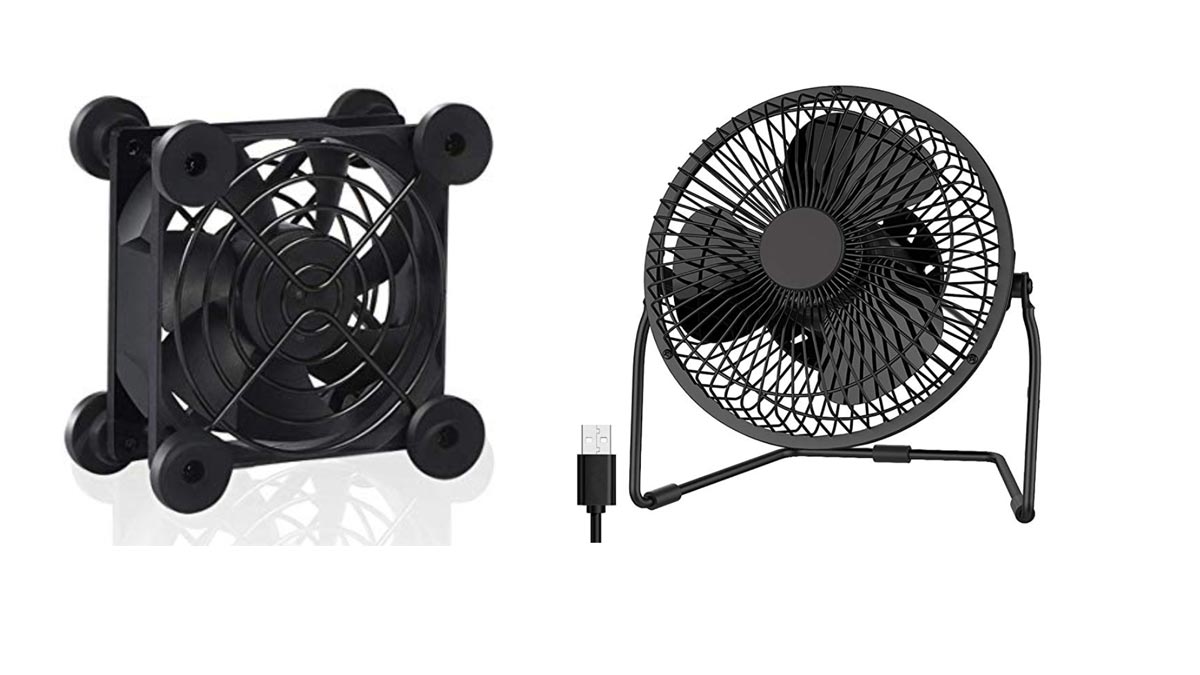
- ventilator
- zip ties
- plant trays
- digital timers
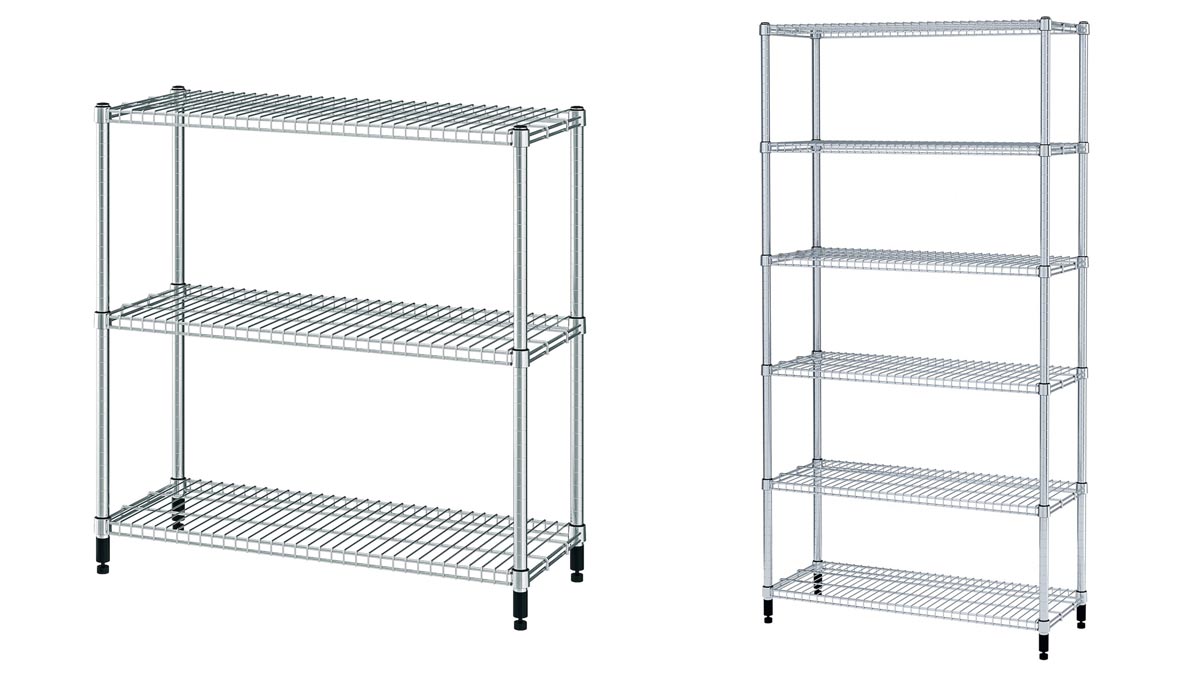
- The shelving system, I’ve bought it from IKEA:
- OMAR 3-Shelf unit, galvanized, 36 1/4x14x37 ” (92x36x94 cm) – price: $25 with adjustable shelves that make it simple for you to adjust the height of each shelf.
- If you have a wall with sufficient height you can also use this shelf as an alternative OMAR 6-Shelf unit, 36 1/4×14 1/8×71 1/4 ” (92x36x181 cm) – price: $50.
An identical system is sold on Amazon too:
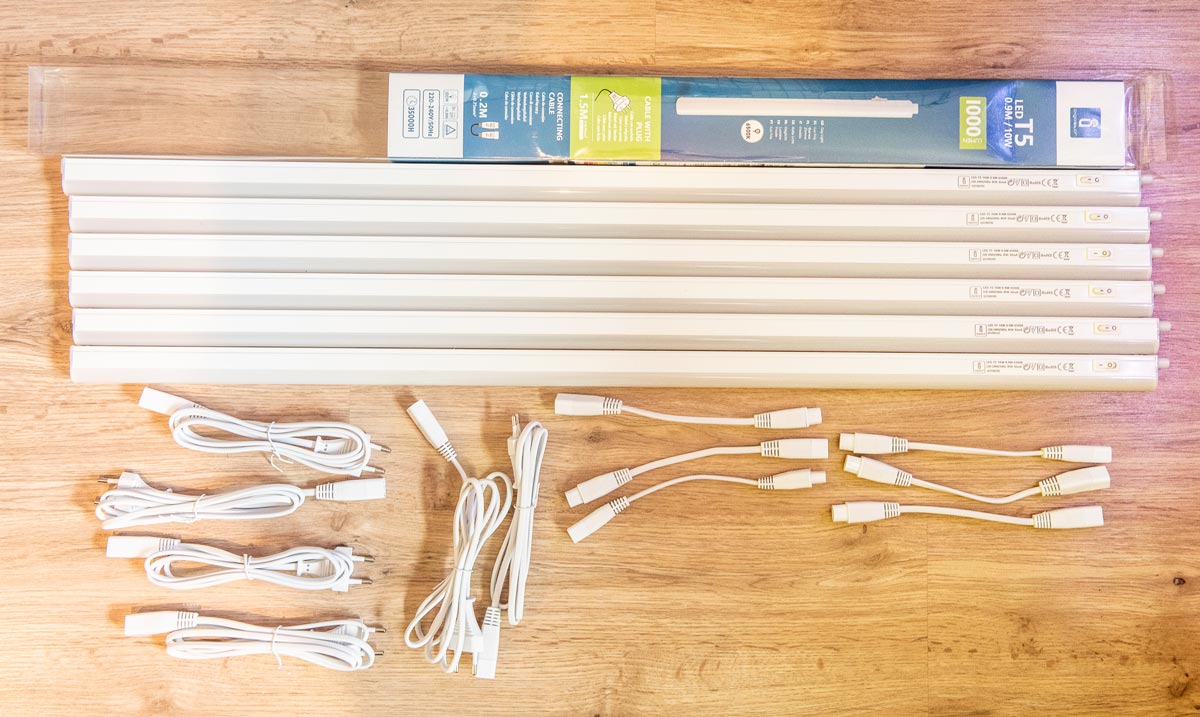
- The lights : 6x T5 LED 90CM 10W 6500K Daylight – $80 – 72 euro
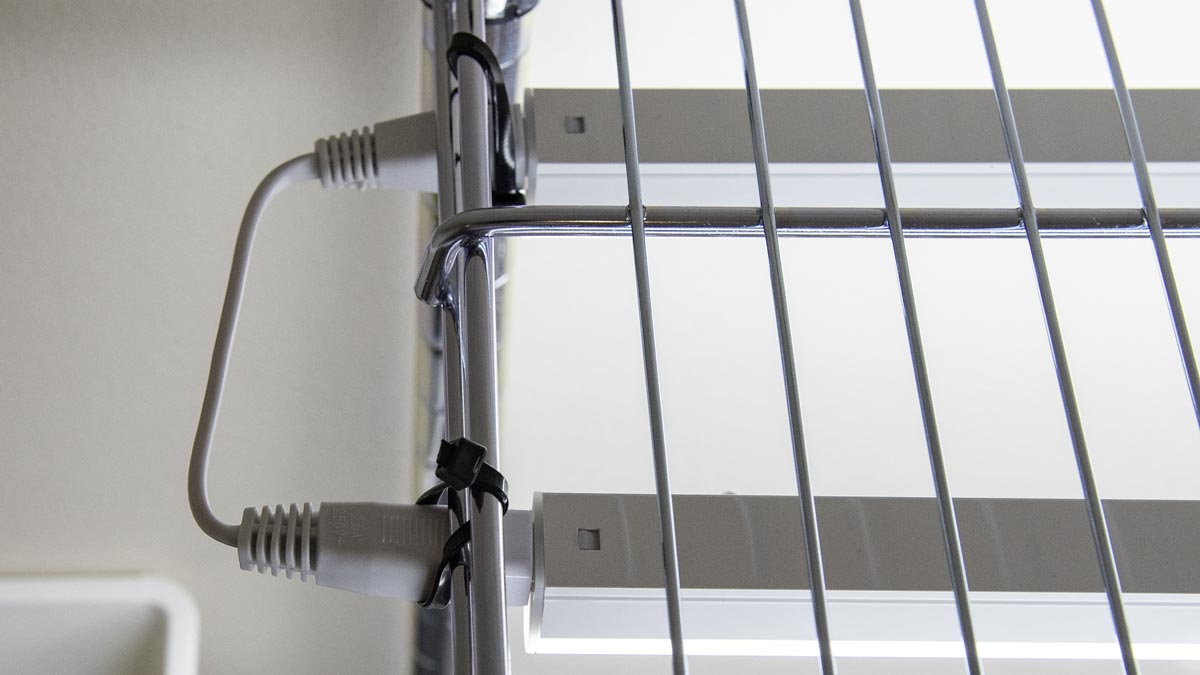
- Each of the LED T5 comes with a electric power cord, a connector wire to link the LEDs
Equivalent T5 LED sold on Amazon :
LED T5 Integrated Fixture 3FT, Daylight White 6500K, 14W, Linkable, Corded Electric with Built-in ON/Off Switch, 4 Pack – $35,00
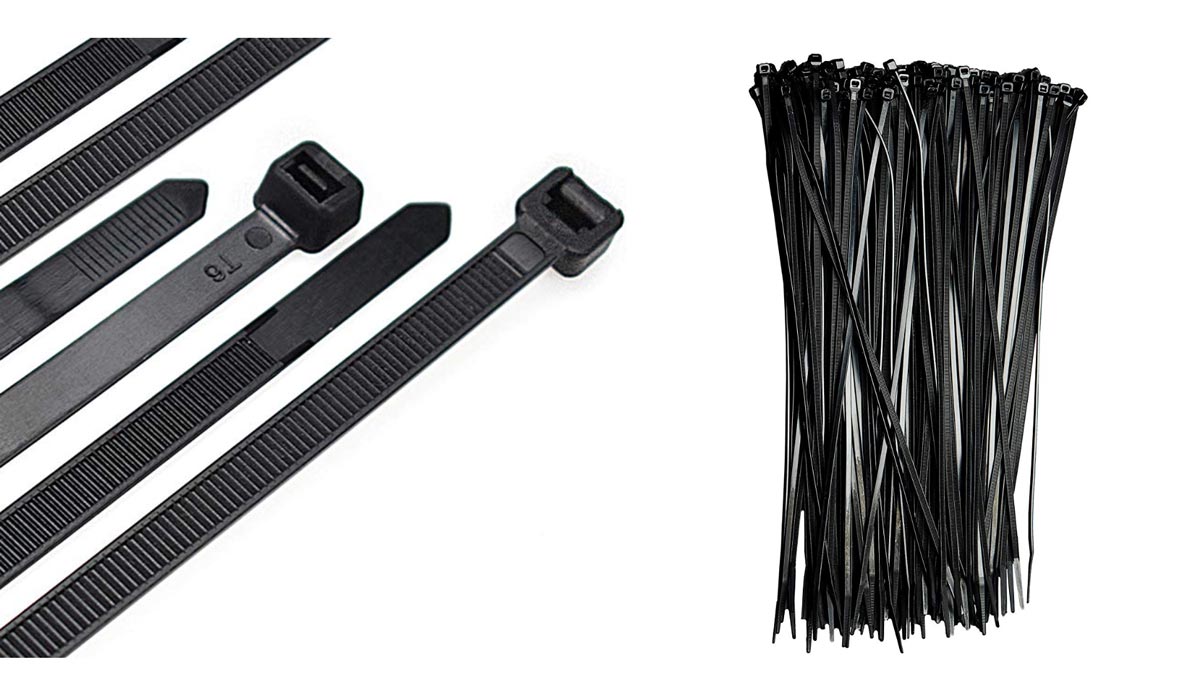
- 8″ Zip Ties, Black Nylon Cable Wire Ties
- quantity needed: I’ve used 2 per LED light and a couple to fix electric equipment. So in total around 15-20 zip ties. They do come in bags of 100 (but some spare zip ties won’t hurt)
- USB Fan
- quantity needed: depends on the number of shelves you want to install. I use 1 fan for my small rack. the idea is to have enough ventilation to prevent molds.
6. Assembling the grow light system – Pictures and Close-ups
Now that I have explained the requirements of a seed starting station, the equipement you need and the cost of this all, let me show you how to assemble the grow light system. I know I wanted to get my first batch of seeds started as quick as possible.
The first step is of course to put the wire frame shelving system together. This was very easy to do with dear instructions of the manufacturer. The height of the shelfs very easy to set and change afterwards.
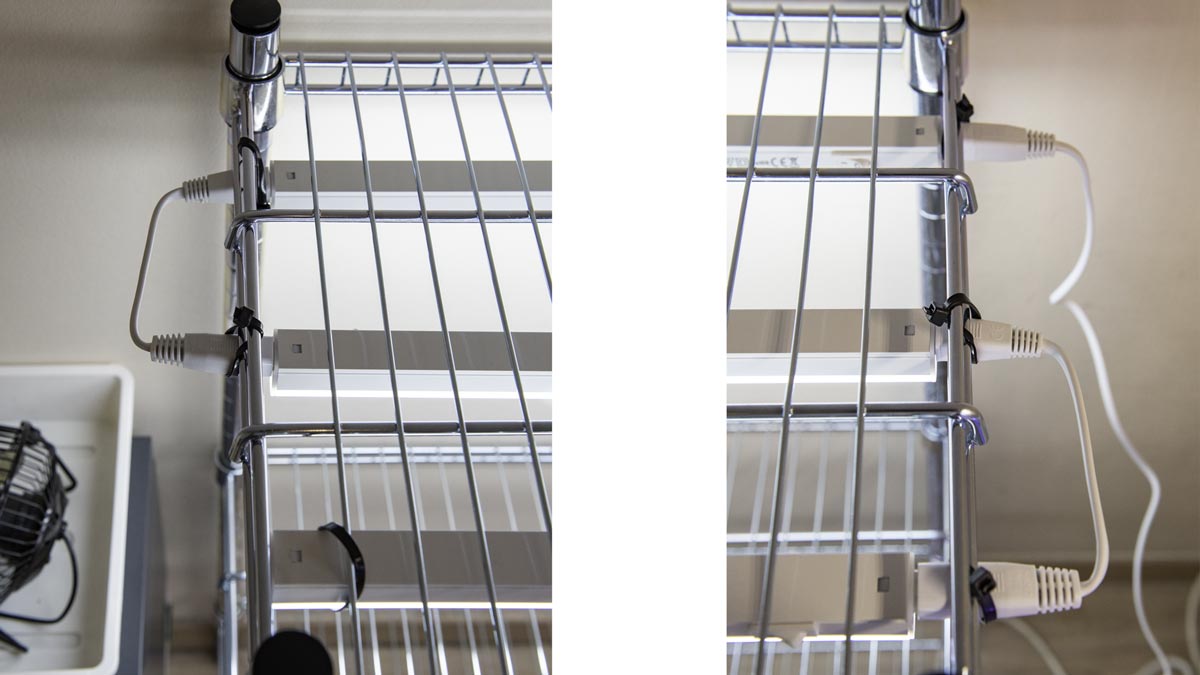
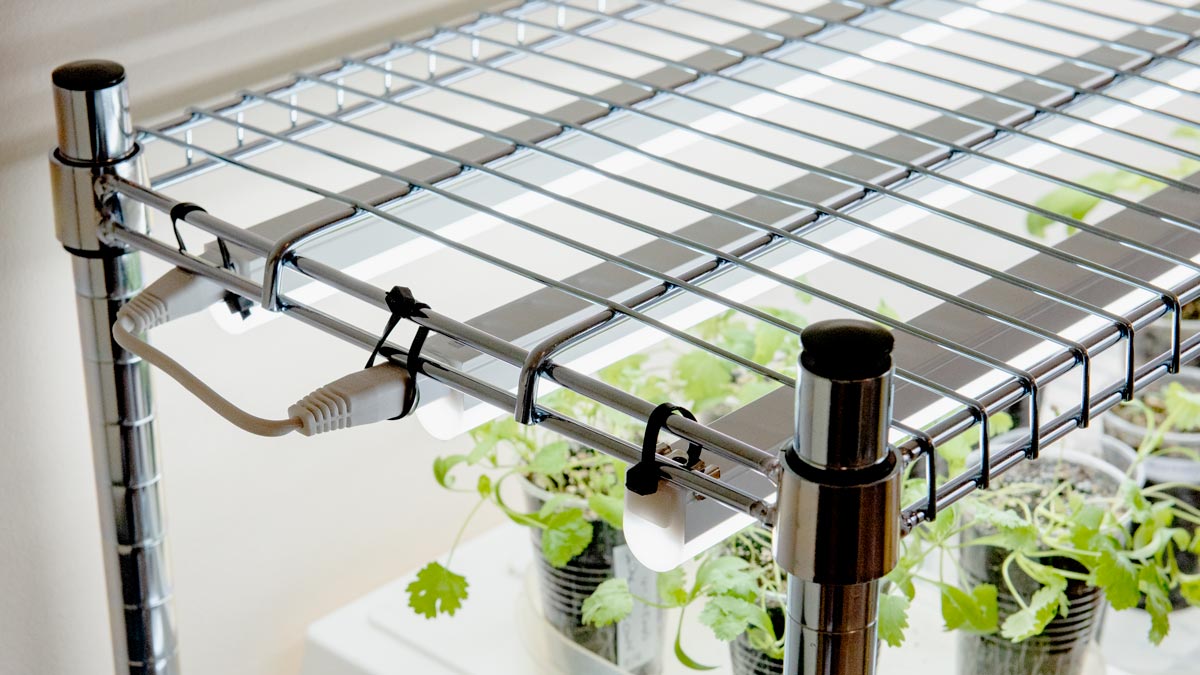
The second action is to attach the LEDs with the Zip Ties to the shelfs.
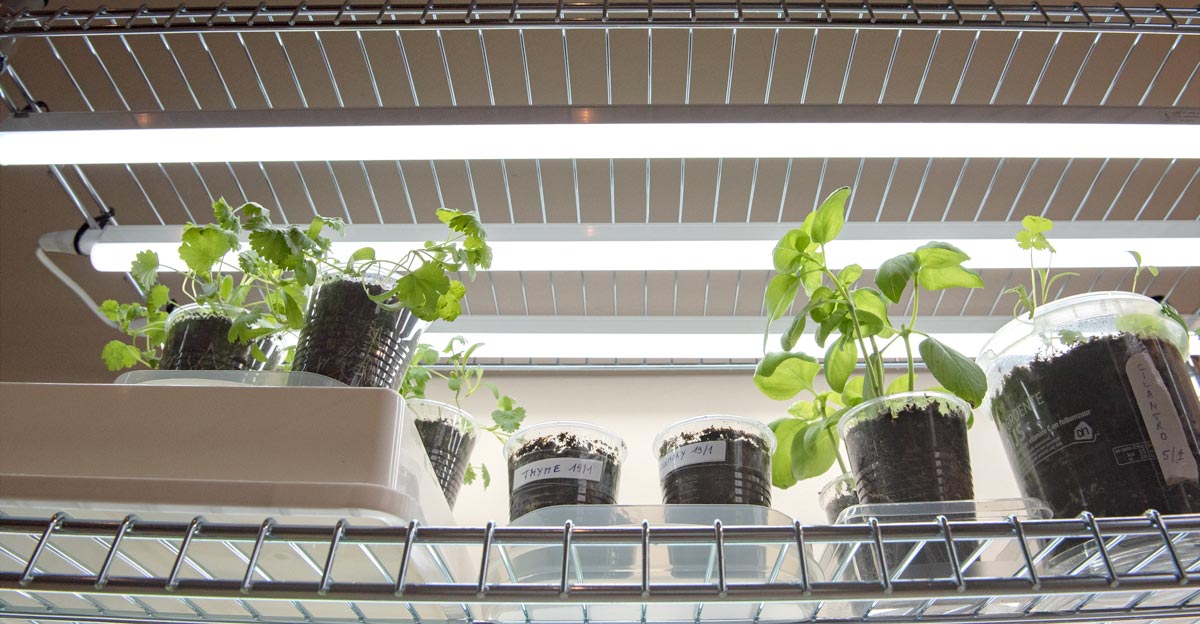
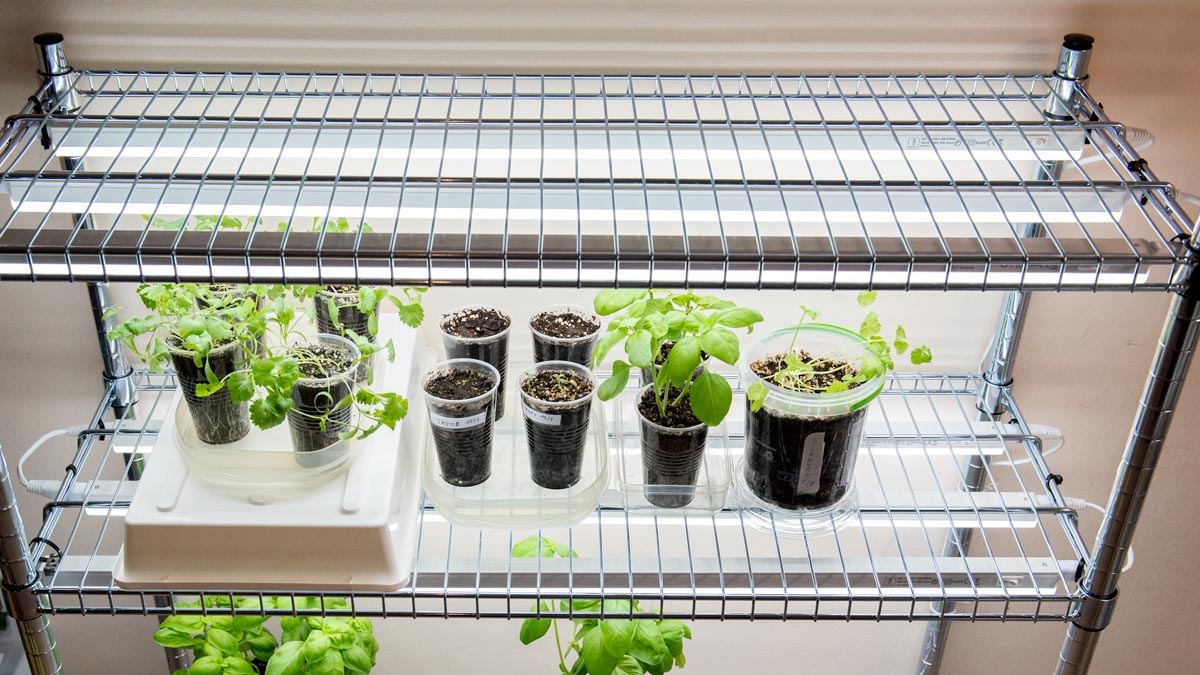
As I have explained above, I’ve used three T5 LEDs to get 3000 lumens on each shelf. The LEDs are interconnected which makes providing current to the LEDs easy and simple. You have different possibilities to fix the Led lights with the zip ties to the wire frame.
I’ve just payed attention to fix the lights in a minimalist way as much as possible.
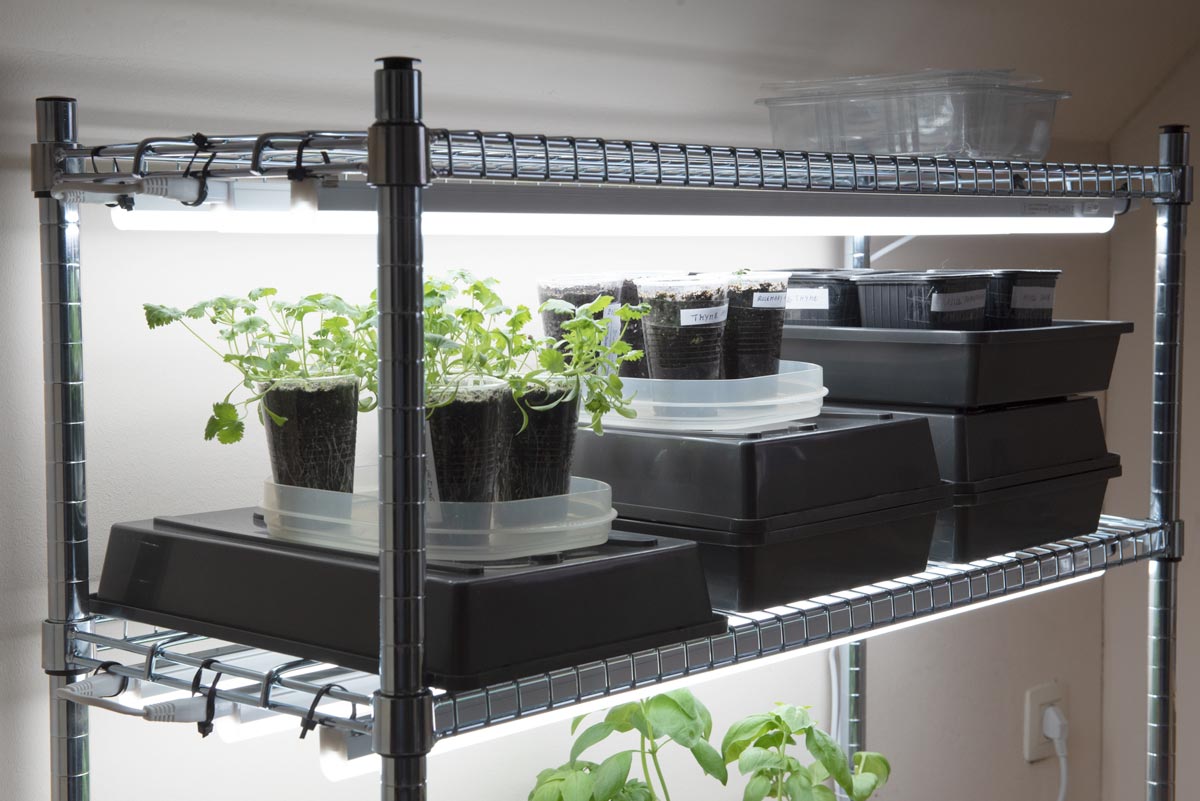
I have chosen to fix the lights to the shelf above in a fixed manner so the distance of the lights to the plants must be realised by moving the whole shelf or to change the position of the plants towards the lights. I use the black water trays for proper bottom watering and also to adjust the distance between the lights and the surface of the herb plants or pots.
I use the black water trays for proper bottom watering and also to adjust the distance between the lights and the surface of the herb plants or pots.
Here’s a picture of the seed growing rack the same day that I’ve build it. I don’t plan to use heating mats for seed starting. My station is in a room that is warm enough to not have problems with seed germination.
7. How much does it cost to build my own seeds starting system?
Here is an overview from what I have paid to build my grow light system :
- IKEA OMAR 3-Shelf unit : 29,95 euro – ($ 34,00)
- 6 x T5 LEDS 6500k : 6 x 12,95 euro = 77,70 euro ($ 87,70)
- 2 x USB Fan : 21,00 eur0 ($ 24,00)
- Zip ties: 2,00 euro ($ 1,50)
- Digital Timer: 12,00 euro ($ 14,00)
- Electric Extension Cord with USB : 15,00 euro ($ 17,00)
Total cost : 157,65 euro ($ 178)
Here is an overview of equivalent material and equipment you can buy on Amazon:
- 3-Shelf Shelving Storage Unit, Metal Organizer Wire Rack, Chrome Silver (23.2L x 13.4W x 30H) – $34,30
- LED T5 Integrated Fixture 3FT, Daylight White 6500K, 14W, Linkable, Corded Electric with Built-in ON/Off Switch, 4 Pack – $35,00
- 2 x USB Fan : $24,00
- 8″ Zip Ties, Black Nylon Cable Wire Ties : $5,00
- Digital Timer : $14,00
- Power Strip with USB 5 Outlets 3 USB Ports 5ft Extension Cord : $15,98
Total cost : $ 128
The cost of this DIY growing light shelf system is very likely 5 to 10 times cheaper than the cost of some professional seedling carts, and basically both do the same. And to be honest the setup is properly done and even aesthetically quite ok.
The LEDs will have a lifespan of around 4 to 5 years. And this means you can save a lot of money with growing herbs yourself.
8. VIDEO : Assembling my seed starting and grow light system
9. What is next?
Now it is up to you. I hope that this guide will have inspired you to build your own indoor seed starting and grow light station. Make use of the equipment checklist and you will be growing healthy and strong seedlings and transplant in no time.
It would be great if you could post and share some pictures of your DIY results in the comments below or in our facebook group.
With this indoor grow light system, seeding herbs is easy, economical, and offers great satisfaction. Now you know how to grow an amazing herb garden indoors.
Don’t hesitate to ask me any question about this set-up or to share your thoughts in the comments below.
Join the community
If you are looking to grow an amazing herb garden, I strongly recommend signing up to our community and gain access to our FREE downloads and regular updates. We want to ensure your success by sharing our tips and tricks with you for growing herbs.
Leave us a comment
If, after reading the information above, you still have a question that remains unanswered, then let me know by mail or in the comments below.

